As part of a continuing series, I'll be highlighting different special stitches and motifs. You may also want to read my previous spotlights on the Horizontal Chain Stitch, Cable Stitches, Bobble Stitches, Increasing and Decreasing Stitches and Basket Weave.
The invention of double-stranded loop yarns like Alize Puffy More and Bernat Alize Blanket-EZ Graph It yarns has made it much easier for loop yarn knitters to create two-colour designs, but these yarns still have some limitations. If you want to make a design with more than two colours, or want to incorporate more than just knit stitches for texture, double-stranded loop yarn can be somewhat restrictive.
To create a multi-colour design with regular loop yarn, you have a few techniques you can use. Which one you choose will depend on the type of design you are looking to incorporate.
The easiest way to incorporate different colours in a project is to change colours in the same way that you would add a new skein of the same colour. My preference is to cut open the end loop of both skeins and then tie them in a knot and continue finger-knitting as usual. This video by Bambi Abi demonstrates this technique:
The other way to change skeins/colours that some people prefer, since it avoids the tying of ends, is to overlap a few stitches of the old and new skeins by double-knitting them, as shown in this video by Marly Bird:
You can use either of these techniques for creating colour-blocking and stripes, like in my Endless Waves Blanket or my Kids' Pumpkin Hat Patterns (where you change colours at the start of a new row):
... as well as for more eclectic scrappy-style projects where you are combining multiple strands of leftover yarn, like my Ripple Blanket and Oval Rag Rug Patterns (where you change colours at the end of each strand, regardless of where you are in the row):
Fair Isle knitting is a type of traditional colourwork knitting that uses two different colour strands at a time. While the dominant colour strand is knitted in front, the secondary strand is carried behind, and then this process is reversed as the knitter changes from one colour to the other.
Doing this with loop yarn is complicated a bit by the pre-looped nature of the yarn, but a few years ago I did create a Fair Isle technique for loop yarn that I used in my Fair Isle Blanket and Mosaic Knit Style Blanket Patterns:
I could have achieved this look simply by double-knitting and alternating which loops of colour were layered on top, but that would have used up a lot of yarn! Instead, I combined a few techniques. First, I cut open some loops, so that I could use stretch the strands of yarn along the back, only using the loops of colour as needed. Second, I did double-knit yarn in cases where the colours alternated more frequently.
Cutting loops has to be done a bit strategically, because you only want to create enough loose yarn to stretch to the next stitch where you need a loop of that colour. You don't want too long of a strand of hanging yarn in the back, but it also cannot be too short or it will create too much tension. In order to prevent the strands from just 'hanging' in the back, I wove them in as I went, by sliding them between any double stitches. This created a back side that fairly closely mimics the look of Fair Isle with traditional yarn:
Intarsia is a type of 'seamless' colourwork. The goal is to introduce a design of a different colour or colours within the larger project that appears 'inlaid'. This sort of colourwork is very popular for creating custom designs like logos, licensed characters or name personalizations.
The easiest way to 'cheat' this look is to just double-knit two strands of loop yarn at the same time, by layering the colour you want to show on top of your base colour. This allows you to continue your base colour for the whole project, and only adding the colourwork detail on top. The end result looks a bit like an embossed design. If your design is not too large, this option may suit your needs.
However, 'true' Intarsia knitting involves changing colours mid-project. Instead of cutting the yarn each time you change colours, you carry the individual colours of yarn upward to the next row as needed, and knit with two or more colours/skeins of yarn at the same time.
There are a few ways to do this, and it's up to you to choose which suits the needs of your design.
One very simple and very linear intarsia pattern is vertical stripes. In the custom blanket below, my customer wanted vertical columns of colour:
To achieve this look, I worked with five skeins of loop yarn - three pink and two grey (the green border was added after the centre blanket was completed). Starting from the bottom up, I knit a row of pink stitches from right to left. Then that skein became the pink skein for my first column on the left. As I knit from left to right, I joined each new skein along the divide of each column by double-knitting the two colours. As I changed colours I dropped the old skein and worked with the new skein, and so on. Basically, there are 5 'mini' blanket columns and each colour is only knit in tandem vertically.
This way of binding as you go by double-knitting the seams creates a very sturdy binding, but once again, double-knitting does use more yarn. There is actually a simpler way to bind two colours, and it will work for more fluid designs (not just straight lines).
The trick is to twist the two colours of yarn at the base to join them together.
You will still need to work with multiple skeins of yarn - if the colourwork motif that you want to add is in the middle of your project with a solid background, for instance, you will need different skeins of the background colour for the left and right side of the motif.
When you want to change colour to start your motif, cut a loop open at the end of the new colour skein and attach it to the previous skein (without cutting the previous yarn) at the base of the yarn in between the previous stitched loop and the next free loop.
Then, when it's time to change colours again, cross the base of the next loop on your current skein with the base of the loop on your new skein (image 2 below), and continue to twist the two loops until each colour returns to its original position (image 3). Then knit the next loop with the new colour (image 4).
And that's it! You'll continue with this same technique every time you change colour.
This technique provides the most seamless way to do colourwork, and you'll have much fewer ends to weave in later!
]]>
As part of a continuing series, I'll be highlighting different special stitches and motifs. You may also want to read my previous spotlights on the Horizontal Chain Stitch, Cable Stitches, Bobble Stitches and Increasing and Decreasing Stitches.
Basket weave is a very common and popular texture for blankets and other textiles. In the case of blankets, this texture is typically simulated by changing the direction of the stitches, rather than by actually weaving.
The concept of basket weave knitting is fairly simple: Your goal is to create the look of stitches that intersect perpendicular to each other, with the yarn travelling over and under the opposing strands, in a manner that resembles the weaving of a basket.
Like actual basket weaving, there are actually many unique looks you can create, simply by varying the thickness or direction of your weave, or by varying your weave pattern. The stitches that you use (knit, purl, etc.) to create the look of your weave will also change the overall look.
Here are some examples of different basket weave patterns:
Checkerboard is the simplest of basket weave styles. The width of the woven sections is approximately equal, and knit and purl stitches are used to create the directional lines of the weave (with knit stitches creating the vertical lines and purl stitches creating the horizontal lines).
You can increase or decrease the scale of your checkerboard by increasing or decreasing the number of rows and columns of stitches, but the goal is that the squares should be approximately the same size.
The tiniest scale of checkerboard basket weave is actually the seed stitch. To create this texture, you alternate knit and purl with every stitch:
We will continue to include templates and charts with all of our Alize Puffy More patterns, but all of our blanket patterns will ALSO include row-by-row colour-coded stitch counts for those who find it easier to follow than the templates.
Here's a sample of what these instructions look like:
Because this update affects such a large number of patterns and purchases, we are not automatically sending out updated pattern copies to our customers, but you may request one by emailing us at ilovemyblanketshop@gmail.com.
Please remember to include:
Some of the most common questions people as are:
We've added several new charts to the website, including:
Loop Sizes / Loops per Skein - details the differences in loop sizes by brand and gives you an estimated number of loops per skein
Loop Yarn Skein Sizes - details the skein weights and lengths by brand
Loop Yarn Conversion Chart - helps you substitute brands and tells you how it will affect your pattern
Loop Yarn Swatch Sizes - gives four different swatch sizes (10 x 10, 60 x 60, 90 x 90 and 110 x 110 stitch swatches) for seven different brands of loop yarn
Not sure how to use this information to answer your questions? We have a solution for that too!
We've compiled these four charts together with a guide and worksheets in printable copies in our Loop Yarn Worksheets download. The guide walks you through how to use the charts and make the calculations you need to answer the questions above, and we've included worksheets you can use and re-use whenever you need.
Ready to create your own patterns? There are lots of websites and apps out there to help you chart your own designs. A couple of customer favourites are:
Alize Puffy More Pattern Maker - this website by Alize Yarns lets you upload images which it converts to pixel graphs for colourwork designs.
Stitch Fiddle - this website helps you chart patterns and create row-by-row instructions.
Prefer to work on paper? No problem! We've created Printable Graph Paper that you can download and use to sketch out patterns by hand.
Our download includes three different gauges of graph paper (90 x 110, 60 x 80, 40 x 50 square grids) as well as two different sizes of knit stitch colouring pages (fun for creating colourwork and Fair Isle designs).
On the back of each graph page we've included space to write pattern details such as the pattern name, yarn brand, yarn weight/type, rows/columns, and width/height, as well as a stitch guide to keep track of the symbols or colours you use to mark your graph.
Are there more tools or charts that you wish were available to help you with your loop yarn knitting? Let us know!
]]>
As part of a continuing series, I'll be highlighting different special stitches and motifs. You may also want to read my previous spotlights on the Horizontal Chain Stitch, Cable Stitches, and Increasing and Decreasing Stitches.
Bobbles are a fun embellishment to add to any blanket or knitting project! You'll find them in standard knitting and crochet, as well as in loop yarn finger-knitting, but the techniques to achieve the bobble 'look' can be quite varied.
First, what is a bobble? Wikipedia has a very good description:
Depending on the look knitters are trying to achieve, bobbles may also be called bubbles, pom-poms, popcorn a variety of names, but the look of them is typically achieved in a similar fashion. While I described the bobble as an 'embellishment' above, these textural features are usually knitted in-situ, rather than added on afterwards.
The basic technique of creating bobbles involves stacking stitches (or increasing and decreasing stitches), with the end result being a raised texture of a bump (or bubble) that sticks out from your knitting surface. Bobbles can vary in size and shape, and may form a hollow on the back of your knitting, depending on the the bobble technique used.
The type of bobble I use most commonly in my knitting patterns has the classic 'bobble' look: A round raised ball that sits above the flat knitting surface.
Patterns with classic bobbles: Cozy Pom-Pom Throw Blanket, Sampler Style Baby Throw Blanket, Irish Aran Tree of Life Cable Knit Blanket, Hexagon Honeycomb Bee Blanket, Easier Hexagon Honeycomb Bee Blanket, Honeycomb Rivet Blanket, Flowered Vines Blanket, Bunny Tails Blanket, Southwest Lace Blanket, Footprints Baby Blanket
The technique for creating this type of classic bobble with loop yarn involves creating a chain of loops, which is then folded forward and tucked into the base of the first stationary loop in a purl stitch. You may choose to increase or decrease the number of stitches in the chain to make your bobble bigger or smaller.
This video from Alize Yarns demonstrates how to create a classic bobble with loop yarn, beginning from the 19:55 mark. (Note that the audio for this video is in Turkish, but I will describe the technique in more detail below).
The blanket in the video is a sampler-style/quilt style blanket with different squares of texture made up of different stitch combinations and patterns. One of these squares has a pattern of staggered bobble stitches.The knitter in the video begins her square with a row of knit stitches. For her second row, she knits one knit stitch. The second stitch in this row will be a bobble stitch.
To modify the size of your classic bobble, you can make your chain longer (instead of pulling three extra loops through your stationary loop, try pulling four or five loops loops through). If you have downloaded any of my patterns that have bobbles in the designs, you will notice that I vary the size of my bobbles to create the specific look I am going for. My Footprints Baby Blanket pattern is a good example of this:
In this pattern, I used bobbles to represent the toes in the footprints. To emphasize their larger size, I opted to make the bobbles for the big toes slightly larger.
Another similar, but typically larger type of bobble is the 'bubble' stitch texture. Bubbles differ from bobbles in that they tend to be larger and wider, and their raised texture creates a hollow on the back side of the knitting surface. They may be more of a highlight texture, or multiple bubbles may be combined over the knitting surface to create an undulating or puffy texture.
A few examples of bubble-type texture are my Squishy Bubbles Baby Blanket:
and my Fortune Cookie Blanket:
You'll notice that these two examples have very different looks. The basic technique of creating a bubble involves increasing stitches to increase the volume of yarn (so that it sticks out from the surface) and then later decreasing stitches to 'close' the bubble.
There are many different textures and looks you can achieve with bubble stitches, by varying the number of increased/decreased stitches, the width and height of your bubble, and the use of different stitches (knit, purl, etc.)
Yarnspirations has a couple of good 'bubble-type' bobble stitch patterns. The first is their Bernat Alize EZ Bobble Scarf. Here's a video explaining the pattern and this bobble technique:
At about the 5:50 mark, to create the bobble, the knitter increases by two loops (for a total of three loops) . Working left-to-right, she then adds a knit stitch to each of those loops (stacking stitches in a similar way as with the classic bobbles above, but using three columns of stitches instead of one). Working right-to-left, she knits three stitches again. She then reduces by two loops back to one stitch.
Once she proceeds to the next row (not shown in video), she will incorporate the bobbles by using the final reduced loop, and the bobbles will stick out from the surface of the project.
Another example of this type of bobble (bubble) stitch is in Yarnspiration's Bernat Alize EZ Multi Textured Blanket pattern. At about the 12:39 mark, you will see the knitter perform the bobbles.
I hope this tutorial helps you become more confident with making bobbles and experimenting with how to create different shapes of knitting texture!
]]>
This guide specifically refers to yarn purchases, but this advice can be applied to most types of purchases from international Etsy sellers.
With the limited selection of colours available from North American loop yarn brands, many loop yarn finger-knitters inevitably find themselves tempted to 'go to the source' and buy loop yarn directly from Turkey (i.e. Alize Puffy yarns).
First, let me help to clear up the relationship between Bernat Alize Blanket-EZ yarn and Alize Puffy yarn, since I see a lot of confusion online. Alize Yarns is the original creator of the loop yarn process used in both yarns. Alize sells their own (original) version of loop yarn in Turkey and in the the European/Middle Eastern/Baltic markets. Bernat is the North American distributor of loop yarns using the Alize process (thus why 'Alize' is part of their loop yarn product names).
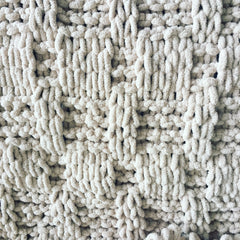
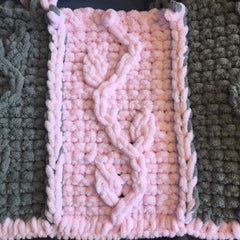
Alize Yarns has several loop yarn options, with many more colours than are available from its American distributor, Bernat. At the time of this blog post, you can find four different types of loop yarn as part of their Alize Puffy line:
(click on the links above to see the colour selection on the Alize Yarns website)
One option to purchase these yarns is Amazon. This option may be a bit less intimidating if you're already comfortable with buying on Amazon, and you have the added purchase protection and return policy*, but your selection is somewhat limited, and the prices are not always competitive.
* Note that while Etsy sellers may each have their own specific shop policies for returns and refunds, Etsy does also offer its own buyer protection policy, which offers some additional protections.
A quick peek at Etsy sellers reveals much lower prices, but the shipping costs can seem very high, and the fear of added customs/duty fees jacking up the cost on arrival can be a deterrent. It's also hard to know who to trust! Everyone's heard horror stories of fake resellers or orders that never arrive, and the thought of trying to communicate with non-English speaking sellers can feel intimidating. And with so many yarn resellers, trying to narrow down your options and pick just one can be a challenge.
I've created this guide as a way to hopefully demystify the process, and provide you with a list of criteria to help you find the right Etsy shop to buy your loop yarn from.
The first step to finding the right Etsy seller for you is to narrow your search results.
In the Etsy search bar, type "Alize Puffy Yarn" (or whichever specific yarn you are looking to buy). Once the results are displayed, you can refine your search by using the filter option.
On desktop, you'll find the 'All filters' button under the top rated results on the left side of your screen. On mobile, you'll find the 'Filter' button under the search bar on the right side of your screen.
When you click on the filter button, you are offered various options. The most important variable is whether a seller ships to your country; so find the shipping option and select your country. Note: Your country may already be set as the default.
On desktop, you will look for the 'Delivers to' option at the bottom of the filter list and select your country from the drop-down menu. On mobile, go to the 'Ships to' option about halfway down the list and select your country from the drop-down menu.
Next, you may want to select the 'Free Shipping' option.
This one is a bit tricky, because although many international shippers may offer free shipping, how they have set up their store settings can vary. Free shipping may be the default, or offered with minimum purchase and calculated automatically at checkout, or they may offer a coupon code that you need to add manually. So although searching for stores with free shipping is a good place to start, you may also want to try searches without this option checked, so that you can widen your search to those other options.
On desktop, you will check the 'Free delivery' box at the top of the filter list. On mobile, you will find the 'Shipping' option halfway down the list and then check the 'Free shipping' box.
Now to review the search results. Accept your filter selections.
On desktop, click on the 'Apply' button. On mobile, click on the 'Show results' button.
Now that you have your search results, there are a few more ways to narrow down your options. Etsy has created one way to help customers to determine what makes a reliable seller, namely their Star Seller Program.
Here's an example of what the Star Seller label and benchmarks look like on desktop for my Etsy store (Etsy routinely changes their interface layout, so this may change):
The 'Star Seller' label indicates a seller who excels in three specific areas, while also meeting a certain number of sales (based on the last 3 months:
During this 3-month period, Star Sellers also need to have at least 10 orders, $300 in sales, and have been on Etsy’s platform for at least 90 days since their first sale.
Click here for or more information on Etsy's Star Seller Program.
A loop yarn store that does not have the 'Star Seller' label may still be an excellent seller! Some International sellers who offer tracking may not follow the correct processes to enter tracking numbers directly on Etsy, preferring to message the seller directly, for instance. Not all sellers have embraced the Star Seller program and prefer to do things their own way - which is fine - the 'Star Seller' label is just one of the ways to narrow down your search.
One of the easiest ways to assess if a seller is reliable is to check their order count. Reliable sellers tend to have higher numbers and repeat sales. This number can occasionally be misleading - for instance a store that sells a variety of items may excel in one area and falter in others. Because stores can sell both physical and digital items, you wan to be sure that they have reliable service specifically for physical items, and even more specifically for the product that you are hoping to buy.
One way to determine a seller's sales history is to go to the seller's storefront and click on the sales number (located under their shop name). Depending on whether the seller has chosen to make their sales history public or private, you may be able to look at this history to see if their sales are based on the item or similar items to what you are looking to buy.
Moving on to reviews: You can see a seller's average review rating on search results, listings and at the top of their storefront. To read individual reviews, you have two options:
One is to scroll to the bottom of the listing for the item you are looking to purchase. Here you will find reviews for the store with reviews specific to the item listing given first priority, and all other reviews after that.
Your second option is to view all reviews at the bottom of the seller's storefront. The order that reviews are presented there is based on own Etsy's algorithm, rather than by date. If you would prefer to view reviews by date, go to your browser search bar and type the stores web address with "/reviews" at the end - this will give you the seller's reviews in reverse chronological order, with the most recent reviews first. This is a good way to determine not just if a seller is reliable, but also whether they are currently and recently reliable.
Positive reviews are a good indicator of a reliable seller, but numbers aren't the only thing that matters - it's important to read the content of those reviews to determine their relevance to your purchase experience.
Some factors to consider when reading reviews:
Item-specific reviews: As mentioned above, you can find item-specific reviews by reading the reviews directly on the listing page.
Country-specific reviews: When buying from international sellers, some reviewers can be very helpful by mentioning their location in their review. You won't always find this information, but it is especially helpful to know the experience of similar buyers, because if there are country- or region-specific issues like delays or extra fees, other buyers are your best resource. Sellers generally will not have this information.
Duty or customs fees: Whether you'll be charged duty or customs fees depends on many different variables, so it's important to understand that no seller can give you a 100% guarantee that you will not be charged customs or duty fees. Even repeat sellers sometimes find that they are randomly charged fees when they have never been charged them in the past.
The reasons for this are a bit complicated, but a few factors that influence this can be the shipping carrier, how the seller and shipping carrier complete the shipping forms, and the size of your order. Buyers sometimes also mistakenly believe they are being charged duty, when in fact its sales tax due on receipt. Either way, your best odds of not being charged are to use a seller and carrier combination that has worked for your peers, so finding reviews that say things like "I use their express shipping option with DHL and have never been charged customs fees" can be extremely helpful.
Seller communications: The best way to know if a seller is responsive and can communicate in your language is to reach out to them with a question! But if you're feeling nervous about it, reading reviews that suggest it will be a positive experience can help.
Buyer tips: Customer reviews can be a great way to find tips to get the best price and select a shipping method. As mentioned above, tips on customs and duty fees, as well as bulk order and express shipping can often be found there. While some sellers mention these tips within their listings, details can sometimes be sparse. Buyers who've done their legwork finding the best deal often enjoy sharing their 'tricks' with other buyers.
Shipping costs are one of the most nerve-wracking parts of buying multiple items on Etsy. Etsy offers sellers the tools to offer reduced shipping costs on multiple items, but that doesn't mean all sellers use them! If you add 10 skeins of yarn to your basket, you may find the shipping cost at checkout ends up being enormous. Many sellers offer free or reduced shipping costs on bulk orders, but you need to know what to do to get them.
The first place to find shipping information is in the search results. You may notice the words 'FREE delivery' or 'Eligible orders deliver free' under the listing price. The next place to look is within the listing description. Finally, if you go to the seller's storefront, many sellers have shipping information either in their banner or in their shop's 'Announcement' section (found under the shop name on desktop, and all the way at the bottom on mobile).
Free shipping can come in a few different forms.
Buying bulk to save on shipping is typically something international yarn sellers are used to dealing with. After all, as resellers, that's how they get discounts on their orders too! If all you are looking for is a few skeins to complete a small project, this probably isn't feasible for you as a way to get a discount. But if you are a blanket-knitter like me, you're probably looking to buy 8-15 skeins at a time for each blanket project.
Note that Alize Puffy yarn skeins are smaller than Bernat Alize Blanket-EZ yarn, so you'll need 80% more skeins to complete your projects as-is. For more information on loop yarn skein sizes and how to calculate how much yarn you'll need for your patterns, read our blog post Loop yarn sizes: How do they compare?
While stores may offer free shipping based on minimum purchase value, they may also have requirements based on specific numbers of items. One of the reasons for this may have to do with packaging dimensions. Yarn is often sent in vacuum-packed bags, so sellers will generally prefer to pack your order in the most efficient way possible based on the requirements of their shipping carrier. Sellers may message you after you complete your order, suggesting your modify your order to include more items so that your order will 'pack better'. As long as they are willing to waive or refund additional shipping costs, you may want to consider this option.
Free shipping doesn't necessarily mean fast shipping, or even tracked shipping! It's important to make note of which carrier your seller is using, whether tracking is included, and what the estimated shipping times are. Sometimes paying for shipping is a much faster and safer option.
Some sellers offer express shipping upgrades. This would be an amount you would pay on top of your purchase to ensure they use their 'express' carrier (typically a courier company with expedited customs clearance capabilities, like DHL or FedEx). This upgrade may be an option at checkout, or may be a separate listing that you need to add to your basket at checkout.
You may be able to combine the upgrade with your free shipping discount (thus only paying for the upgrade), or it might need to be combined with a base shipping cost. This is where speaking directly with your seller becomes crucial, unless their store's description or listings have very clear instructions for you to follow.
Because you may be speaking with sellers whose first language is different than your own, it's best to try to keep your messages and requests clear and without too much extraneous information. (This is a good tip even if there aren't any language barriers!) Keep your questions clear and concise. Some examples of questions you might ask are:
Asking followup questions to make sure you understand the correct purchase process to get any discounts is appropriate. If the seller doesn't offer any discounts, or you cannot come to an agreement on price to your satisfaction, move on to another seller rather than argue over price.
It's especially important with international orders that your contact and address information is correct. You may certainly use the guest checkout option, but registering for an Etsy account gives you more options for tracking your purchase history. Your purchase confirmation and tracking numbers will be sent to your email so be sure it is correct before checking out! Double-check that your mailing address includes any unit numbers.
Secondly, when you are on the checkout screen, you will see a box with an option to add a note to the seller - this is a good spot to add your phone number for the seller to add to the shipping label. This allows the shipping carrier to contact you with shipping updates. Other types of instructions you may want to add here are things like "Ship with order #XXXX" if you have multiple orders, or "Please all same dye lot".
Finally, when you have the opportunity to review the seller, be sure to return the favour and add lots of detail for other buyers about your experience!
And that's it! I hope this has helped you feel ready to dive into the world of buying from international Etsy sellers. If you have tips that you have found useful, please feel free to add them in the comments.
Performing long stretches, or even multiple rows of purl stitches can be tedious. They don't just flow through the fingers the way knit stitches do. Unfortunately, if your pattern calls for them, they're unavoidable. But why purl when you can knit?
A purl stitch is just a backwards knit stitch!
If you flip your project over and knit your loops on the other side, they will look like purl stitches on the front side. Just remember to turn your project back to the front side when you finish your knitted loops, before continuing with the rest of your pattern instructions.
If you notice an error in your design a few rows back (maybe you crossed over left when you should have crossed over right), there's no need to frog entire rows of loops. You can just undo the loops in the rows above the problem areas, correct your mistake, and then re-stitch the loops all the way back up.
If you are following a pattern template, redoing your columns of loops should be fairly easy. If not, make sure to make a note of what the stitches were for the loops you are undoing, so that you don't get mixed up on your way back up!
This video by The Crochet Crowd gives some examples of fixing stitches this way:
So you added an extra loop or missed knitting a loop and didn't notice until several rows later (or maybe not until you finished your project) - Do you need to frog your rows and go all the way back to your mistake?
The honest answer is: maybe.
If you are knitting a simple knit and purl blanket that doesn't have a very complicated pattern, your mistake may not be that noticeable, and there are ways to incorporate un-knitted loops into your project to hide your error.
This blog post by It's Always Autumn has a video with some good troubleshooting tips for fixing those extra loops: 'Loop Yarn For Beginners {Everything You Need To Know!}'. (If you scroll down to her section on 'How to use Loop Yarn', the second video shows you exactly how to reincorporate the missed loops.)
But if you are following a more elaborate pattern that requires a specific order of stitches and counting loops to make it look right, then missed or added loops may cause problems for you, because you now have either too many or too few loops in your rows and the numbers won't add up! So yes, unfortunately, you'll probably need to redo them.
On the plus side, because you do have to count loops for fancier patterns, you'll probably notice your error within a row or two, so going back and redoing those rows shouldn't be too time-consuming.
Loop yarn is now available through many manufacturers, and while they are all very similar, there are size and texture differences between brands. (To get an idea of which loop yarn brands are available by country, see our Where to Buy Loop Yarn guide.)
Each brand of loop yarn should have the skein dimensions listed on the packaging, including the skein weight in grams and ounces, and the skein length in metres and yards.
Skein sizes differ across brands, so how many skeins you will need for your project will vary. (My loop yarn guide at the link above also has a Conversion Chart to help you calculate the different number of skeins you'll need for my patterns).
While each manufacturer tends to have standard skein sizes by brand, be aware that sometimes different sizes of skeins of the same brands can be sold in different markets. So what you get when buying from vendors on Etsy, Amazon, EBay and AliExpress may be smaller or larger than what you were expecting.
Always check the listing descriptions to avoid costly mistakes!
Mixing different sizes of loop yarn may cause the rows of your project to squish and stretch. You may be able to accommodate these size differences by increasing or decreasing stitches, but it will inevitable alter the uniform look of your finished pattern. (To compare the differences between the major North American brands of loop yarn, see our blog post 'Loop yarn sizes: How do they compare?')
When you have a certain size requirement for a blanket and are estimating how much loop yarn you will need to buy (and how many loops you will need for your starting row), keep in mind that using special stitches may squish the width of your finished blanket.
While knit and purl stitches give you a finished blanket of essentially the same width, criss-cross stitches will reduce the width, and chunky cables will decrease it even more substantially. Blankets and other projects that have a lot of these special stitches will need a greater number of loops in your starting row to achieve your intended width.
Binding your edges really gives your project a nice finished look, and actually makes the edges of your blankets and clothing items more secure and less vulnerable to fraying.
For blankets or other projects where you finish with a final row of loose loops, binding (also known as casting off) is necessary anyway, so why not continue that around the other edges too? Binding your edges is also a great way to get your project to lay flat (especially with all-knit stitch blankets that want to curl).
If you don't want to bind all four sides of a blanket or other project (like a scarf) and just want your top and bottom edge to match, there is a way to *start* your project with a bind-off as well!
This video by GoodKnitKisses shows how to count extra loops to bind your starting row (from the 9:30 mark):
So you finished your blanket and it's too small - should you rip it all out and start over? You could, but that feels like a lot of hard work wasted! And maybe your miscalculation has also resulted in a limited number of skeins of that colour - what then?
Instead of frogging your blanket - add a border! You can add a border of the same or a different colour around all four sides (or even just the left and right side) but feeding loops through the edge of your blanket and building rows vertically outward. Now you've turned your design 'oops' into something unique!
We get that the point of loop yarn is to be needle- and hook-free, but maybe that just doesn't work for you! Especially with the smaller-gauge loop yarns, using your fingers can be fussy. If you got into loop yarn knitting because of dexterity issues (maybe you have arthritis, or maybe you just have gorgeous chubby digits!), there is no reason you should be suffering for your craft. You're allowed to do whatever you can to make your crafting easier and more enjoyable!
I use a metal crochet hook (size J) when I'm working with double-stranded loop yarn (like Alize Puffy More) to pull my loops through. You could just as easily use a larger hook for larger loop yarn, but you might need something bigger.
Crafting should be something that you enjoy, not a source a constant frustration. If something isn't working for you, there might be a different or easier way to approach it - which leads to the most important tip of all - ask for help! Whether it's your local knitting group or online, other people can be one of your greatest resources.
Sometimes all it takes is a fresh set of eyes to figure out where you're going wrong. We've all had those moments where we stare at something helplessly for an hour, only to show it to someone else and have them point out the problem in 30 seconds!
I hope these tips have helped! Do you have any tips or tricks with loop yarn that you wish someone had shared with you? Share them below!
]]>
Hand knitters are encouraged to use our patterns! Read on to learn a bit about what to expect when using a finger-knitting pattern for hand-knitting.
There is a lot of overlap between finger knitters and hand knitters. Both groups share an affinity for large gauge, chunky chenille yarn. Both have shunned traditional knitting with needles, in favour of a more hands-on approach to knitting, and the ability to make large-scale projects quickly. Knitting with jumbo yarn means finishing your knitting project in days, instead of weeks or months - we love that instant gratification!
Customers frequently reach out to me, asking whether my patterns will work for hand knitting. The short answer is: Yes, absolutely!
The techniques used in finger knitting are basically the same as hand knitting, with one major difference - loop yarn. Because finger knitters use yarn with prefabricated loops, they don't have to worry about gauge or making sure the size of their loops stays the same. But otherwise, the stitch techniques are the same.
Hand knitters need to know a few extra techniques, like how to create a starting row, but otherwise, knit and purl stitches are performed the same way, as well as many other stitches. So if you want to translate a finger-knitting pattern into hand-knitting, you can basically go right ahead, with a few small difference/adjustments.
Each of the blanket patterns for regular loop yarn finger knitting on this website include the following:
As a hand knitter, because you will be using a different yarn and different technique, your finished project may look slightly different than the photos shown in the pattern, and the dimensions of your blanket may be impacted.
If you want to get a sense for the stitch gauge of the original pattern, I recommend consulting my blog post Loop Yarn Sizes: How do they compare? In it, I detail the differences in the loop sizes of the different brands of loop yarn I use in my patterns.
Replicating the small gauge of the original pattern may be impractical, but comparing it to the size of hand loops you are comfortable with will help you estimate the finished size of your hand knitted project.
For stitches you are not familiar with, you may find it useful to refer to the stitch guides including with your pattern. Keep in mind that the guides are written for finger knitting, so the assumption is that you are working with pre-formed loops. Create your own loops as you normally would when hand knitting, and then follow the instructions from there!
Hand knitters should be able to follow the written instructions with no problems, with a few exceptions. For your starting row, while finger knitters can just count out the correct number of loops and dive in, hand knitters instead need to create their starting chain of loops from which to knit the rest of the rows of their blanket.
This video tutorial by Lisette Bencomo shows you how to begin your starting row (as well as the techniques to hand knit a plain knit-stitch blanket).
Other than the starting row, the rest of the row-by-row instructions should be fairly straightforward to hand knitters.
Some knitters prefer to knit straight from a chart, rather than reading row-by-row instructions. Hand knitters should be able to use the charts included with each pattern with no problems. Just remember to refer to the Stitch Guide - each stitch description includes a symbol or letter for use as a legend for the chart.
Here are some examples of my patterns as originally finger-knitted by me, vs. hand knitting by my customers:
Here's my Celtic Knot Lattice Blanket, finger-knitted with Alize Puffy loop yarn:
And here is the same pattern hand-knitted by my customer, Donna:
Here is my Chunky Celtic Cable Saxon Braid Blanket, finger-knitted with Bernat Alize Blanket-EZ yarn:
And here is the same pattern hand-knitted by customer @mbblankets:
If you are a hand-knitter and you're enticed by my patterns and would like to give them a try to see if they will work for you, I encourage you to check out my Free Patterns first, to 'test drive' them and determine if my pattern-writing style feels like a good fit for your abilities. Once you're ready to dive into paid patterns, certainly feel free to reach out to me with any questions you have! You can send me a message using my Contact Form.
Happy knitting!
2021 was my second year of business, and the first full year of ilovemyblanketshop.com. Here are some highs and lows (mostly highs!) of the past year:
As always, I was busy. I wrote 76 new patterns this year - that's almost 1.5 a week! As usual, my main focus was on Irish and Celtic designs, but I continued to write a variety of geometric and textured designs as well. New to the portfolio were a bunch of Scandinavian colourwork designs, which I've loved doing, and will probably continue with - like the Irish/Celtic patterns, they've been very popular and have become an ILoveMyBlanket signature style.
I also wrote more Small Project Patterns this year - blankets will always be my primary focus, but like you, I'm always trying to find ways to use up my leftover yarn, and finding ways to use up every last scrap is important to me!
Lastly, I wrote a line of Basic Starter Patterns. When I started writing patterns for loop yarn, my focus was creating new and original designs that loop yarn knitters couldn't find anywhere else. As my portfolio and business have expanded, I realized there was a benefit to adding more basic and easy patterns to make my store accessible to every level of loop yarn knitter, including those just starting out. These have been well received; which has reinforced the notion that there is a market and need for them, so I hope to add a few more during 2022.
In February, I ordered my first Alize Puffy yarns from Turkey (through Etsy seller Happillow). Like many knitters, I had been experiencing loop yarn supply shortages through my usual channels and finally decided to bite the bullet and branch out. I had seen other knittings use the Alize Puffy yarns, and was impressed by the large colour assortment available. I was also intrigued by the new Alize Puffy More double-stranded loop yarn and wanted to give it a shot.
I had a good experience with both new yarns (although I wish the Alize Puffy came in larger skeins!), and worked mostly with these two brands for the rest of the year.
I continued to sell knitting this year, at about the same pace as last year, but my custom orders definitely took off! I love the challenge of custom work, and it also gives me a chance to revisit old patterns that I haven't knit since the original sample.
I also took several requests for pattern designs over the year, which resulted in some very popular patterns, so I definitely value your input and suggestions! I occasionally have to decline suggestions if they involve trademarked items or if they involve techniques or skills that I don't think I have, but that's thankfully fairly rare.
I finally bit the bullet and participated in an in-person craft show this year. It was a necessary exercise, really, to confirm to myself that it's not for me! I see many sellers who do very well with craft show sales, and I can see the appeal! But as Ii suspected, like many things, it's not something you can 'dabble' at - you really need to commit to making it a regular part of your business to succeed at it. And practically speaking, I don't have the physical ability or energy to devote to it. I've always been fairly good at in-person selling and customer service, but at my core I'm an introvert who thrives by focusing on pattern-writing and knitting on my own, at my leisure. You can read more about my craft fair experience (and some beginner's tips) in this blog post.
Last year I shared your knitting pics in a single year-end Instagram post, but this year - holy cow! So many pics! You all blessed me with so many work-in-progress and finished product pics of your knitting using my patterns and I love it! Whether you followed the patterns as-is, or made modifications (or mashups of multiple patterns), they've all been wonderful to see. You Inspire me!
More blanket patterns! Of course I will continue to write patterns, but this year is a bit of a transition year for my family as my chick leaves the nest, so I may have some short pauses in pattern-writing as I deal with each of our moves. I am also hoping to take some short breaks this summer; but we'll see. It's hard to shut down my creative impulses, so don't be surprised if I just never stop!
New products! In the last few days of 2021, I released the first batch of my new Stitch Markers and Charms on my website and Etsy. Time will tell if this is a popular item or not. I hope so, because they've been really fun to make, and I have lots of ideas or new charms.
More Big G(r)AY Blankets! I sold quite a few of these in 2021, but I tend to be fairly conservative in my yarn purchases, so I've never had more than 1 or 2 in stock. I've added a Custom Big G(r)AY Blanket listing to both my website and Etsy, so you can order one anytime you want, but I'm also hoping to order enough yarn to make these blankets with a bit more frequency throughout the year.
I'm sure there will be other changes and new things throughout the year - life continues to throw surprises my way, which in turn challenges me to come up with novel and creative solutions. Here's hoping the new year brings more positives than negatives!
Love and loops,
Reena
]]>
This tutorial is also available as a free digital download here.
The end of the year tends to be when I start looking at my stash of leftover yarn and thinking "how can I turn all these ends into a project?"
I'm not sure if it's just because I've spent all year knitting, but Christmas is very much on my mind this month (have to plan ahead!). I'm ready to come up with all the Christmas knitting pattern ideas. Well, maybe not ALL of them. But I do have this cute and easy holiday garland idea to share with you.
This technique is definitely one you could do with your kids - it's simple and you can vary the design with different colours and different loop yarns, and it's fast enough to keep their attention for a short crafting session.
You will need a length of loop yarn three times the length of the garland you wish to create. Add a few extra loops so that you can cut open the loops at each end of your garland to cut open and tie the ends off.
You will only need your fingers and some scissors! At the end of this post I will share a variation using double-stranded loop yarn - for that variation, you may want to use a crochet hook. To see the size of hook I recommend, see my blog post What Tools Do I Need?
Count out the number of loops you want for your starting row, with one or two loops extra loops at the end to cut open (for tying off later). Place the cut end to your left.
Working from right to left, pull two loops of working yarn through each loop of your stationary (starting) row. You are increasing by one loop for each stitch.
Once again working from right to left, you are going to 'bind off' the entire row. Beginning with the first two loops, pull the 2nd loop through the 1st loop. Then pull the 3rd loop through the 2nd loop. Pull the 4th loop through the 3rd loop. Continue in this manner until you have completed the entire row.
Your garland should now curl in a spiral!
Now that you've mastered the basic technique, you may want to play around with variations.
I really like the look of bi-colour garlands. To make this one, I used a different colour strand for row 1 and 2. Another option would be to use multiple scraps of yarn or variegated yarn for a more eclectic look!
For this purple garland, I added bobble stitches every third stitch of row 2. Try playing around with different textures of stitches (like twisting the stitches of row 1 before pulling your loops through) or row 2 for different effects!
If you want a more dramatic spiral, you can experiment with increasing by more loops in row 2 (pull three or more working loops through your stationary loop instead of just two).
Creating a spiral garland with double-stranded loop yarn like Alize Puffy More or Bernat Alize Blanket-EZ Graph It, uses the same concept as the loop yarn garlands above, but in reverse.
The twisting of any knitted garland is created by a difference in loops/stitches in one row or side of your garland. The row or side with the greater number of loops creates a curve in your strand, and continuing this along the row causes the strand to curl into a spiral.
With the double-stranded loop yarn, instead of increasing loops, we are actually going to decrease loops in one colour.
For this yarn - you will only need a single row/strand of yarn, so count approximately 1/3 more loops than you want the length of your strand to be.
Choose the colour you want on the inside of your spiral that will be Colour 1.
Count out the number of loops you want for your the length of your garland, with one or two loops extra loops at the end to cut open (for tying off later). Place the cut end to your right.
Using a similar technique to what you would use for your starting row in a blanket pattern with Alize Puffy More yarn (see my APM Instruction Sheet), you are going to connect the loops of your row in a chain (similar to the 'Binding Off' instructions above), BUT instead of pulling your 2nd loop through your 1st loop, you are going to decrease stitches by pulling two loops through your first loop. This is most easily done using a crochet hook.
Starting from the cut end on the right, slide your crochet hook through loop 1, 2 and 3. Pull loops 2 and 3 together with your hook through loop 1. Keeping those two loops on your hook, slide the hook through your next two loops and pull them back through those first few loops. Continue right to left until the end of the row.
Returning to the right end of your yarn, you will now create a chain with the second colour. Working from right to left, bind off the entire row: Pull the 2nd loop through the 1st loop. Then pull the 3rd loop through the 2nd loop. Pull the 4th loop through the 3rd loop. Continue in this manner until you have completed the entire row.
The garland should now spiral! Like the loop yarn garlands above, you can modify the tightness of the spiral, but instead of increasing by more stitches, you will decrease by more stitches. Try pulling 3 stitches through each loop of your chain instead of 2.
And that's it! I'd love to see your variations and holiday displays with garlands! Be sure to share them and tag me on instagram @iloveblanket
]]>
As part of a continuing series, I'll be highlighting different special stitches and motifs. Be sure to read my previous spotlights on Cable Stitches and the Horizontal Chain Stitch.
There are many ways to use increased or decreased stitching in your knitting projects, including to modify your project's dimensions and to create unique motifs.
Increasing and decreasing stitches are techniques most frequently used when knitting garments, in order to increase or decrease the width or circumference of your project. Adding stitches increases the knitted surface; and removing stitches reduces it.
For example, in my Fish Tail Mermaid Hat pattern, The body of the hat tapers at the top where the tail is attached. In order to achieve this effect, stitches are reduced in the final few rows.
In examples like this, where the specific texture does not matter and the goal is reducing width, the technique is simple: Feed your loop of working yarn through two (or more) loops of stationary yarn (usually in the direction of the row you are knitting).
Here is a short video clip showing the technique:
Increasing stitches is often necessary when knitting blankets in the round, where the circumference of your project increases every row. If you do not add enough stitches, your edges will start to curl; whereas if you add too many, your edges will start to ripple.
To increase your project by one stitch, you will perform a knit or purl stitch, but instead of pulling one loop of working yarn through your stationary yarn, you will pull two. For each extra stitch you pull through, it will increase the width of your project by one stitch.
Here is a short video clip showing the technique:
Examples of patterns that use increased stitches to increase their circumference: Rainbow Throw Blanket, Infinity Square Blanket, Circular Crochet-Look Throw Blanket, Oval Rag Rug
Combining increased and decreased stitches in the same row of your blanket can create a wavy row pattern. GoodNightKisses demonstrates this technique in their video tutorial of the Zig Zag Blanket Pattern from Michael's:
The key to this technique, in order to create rows with an equal number of stitches and symmetrical waves, is to remember that there should always be the same number of increased and decreased stitches in each row.
Examples of patterns that use this ripple/chevron technique: Ripple Blanket
When you decrease a stitch, stacking your two stationary stitches creates a texture. If you pull your working yarn through your right-hand stationary stitch, the left stitch sits on top, and crosses slightly to the right (I call this double-knit left over right)*. If you pull your working yarn through your left-hand stationary stitch, the right stitch sits on top, and crosses slightly to the left (I call this double-knit right over left)*. You can take advantage of the stitch order to create specific textures and motifs in your pattern design.
* In my patterns, if the placement and order of your decreased stitches affects the look of the design, I describe the order by changing the name.
Below is a swatch from my Wall of Climbing Vines Blanket Pattern. You can see the centre vine design has leaf motifs on either side. You will notice the pointy, tapered top to each leaf - a shape/texture that it is not possible to achieve with regular knit and purl stitches.
Each leaf motif is three stitches high and two stitches wide. To create a simple leaf motif, such as the ones on the left side of the vine, you will follow these instructions (from the bottom, working your way up).
This leaf on the right side of the vine uses a similar technique, but in a mirror image, so your bottom row would be:
Skipping a working stitch for each stitch that you decrease is important, because it will maintain a consistent width for your blanket from row to row. The skipped stitch creates a small hole or 'lace' in your blanket, but it's a very subtle look.
Examples of patterns that use this leaf motif: Wall of Climbing Vines Blanket, Diagonal Vines Blanket, Flowered Vines Blanket, Spiralling Vines Throw Blanket, Wheat Ear Cable Blanket.
This 'pointy' shape can be used in other motifs too! I also used it for the tops of my rabbit ears in my Bunny Tails Blanket, and the tips of my Butterfly wings in my Butterfly Baby Blanket.
While the 'holes' of the skipped stitches in the above leaf motifs are very subtle, you can choose to highlight this feature by using them repeatedly in combination with decreased stitches. This technique lends itself towards making geometric shapes, for instance.
You can combine left-leaning diagonal lines (made by combining a skipped working stitch on the left and a 'double-knit left over right' decreased stitch on the right), with right-leaning diagonal lines (made by combining a skipped working stitch on the right and a 'double-knit right over left' decreased stitch on the left) in your designs to make various shapes, including triangles.
Some examples of patterns using this technique are: Southwest Lace Blanket, Shadow Triangles Blanket.
My lace leaf motifs combine the pointy tip of a simple leaf motif as well as the crisp edge lines of the geometric motifs above.
This is a tricky motif! It combines skipped stitches (which gives you the lovely veining along the centre line of the leaf), single decreased knit stitches, single decreased purl stitches, as well as double decreased knit stitches. The technique for each of these increased stitches is basically the same, with the only difference being the order and placement of the loops. Here's a quick run-down of these variations:
Here's a short video clip showing these techniques:
Here's a short video clip showing these techniques. Note that the triple-knit right stitch is used when moving left-to-right and the triple-knit left stitch is used when moving right-to-left):
Some examples of patterns including lace leaves are: Northern Forest Blanket, Lace Leaf Baby Blanket, Lace Branches Blanket
Further examples of patterns that use decreasing stitches to create different effects are: Acorn Stitch Throw Blanket, Caterpillar Cable Blanket
Bubbles and bobbles are a fun high-texture addition to blankets and garments. To make these, you will increase stitches in one row and then decrease them again in either the next or one of the following rows. Again, it is important that your net increase and decrease is zero, to ensure that both your bubbles and blanket will be balanced.
My Squishy Bubbles Baby Blanket uses this method of increasing and decreasing stitches to create large bubble texture.
This is easier than it sounds! To create the bubbles in this image, for example, you would follow these instructions (from the bottom, working your way up). The base width of your bubble is one stitch.
* In my pattern, I call this 'Increase 5 loops' to emphasize that you are pulling five loops of working yarn through your stationary yarn, although really you are only increasing by 4 loops plus 1 regular loop for a total of 5.
And that's it! Obviously this is a yarn-heavy technique (11 loops take the space of 3), so the more bubbles you add to your design, the more yarn you will need to account for each embellishment. When creating your own bubble designs, you can try playing around with the size of your bubbles by adding greater or fewer loops.
Another example of this bubble technique is my Fortune Cookie Blanket.
I hope these tutorials help, and inspire your creativity to combine increased and decreased stitches to make your own unique motifs!
]]>
There are many practical reasons why I have been resistant to in-person craft markets (life-threatening viruses aside), including:
Having said all that, I recognize the importance of exploring all avenues for sales (can't knock it until you've tried, it, right?) and appreciate that in-person sales present an opportunity to meet, interact and develop relationships with customers that can't necessarily be replicated elsewhere! So I always have my feelers out for potential opportunities to test the market.
Recently, one of the virtual marketplaces where I list my knitted items, had a one-day, in-person craft market for a very low and reasonable fee, and I decided to give it a try. I learned a fair bit in preparing and participating for that market, which I decided to share here.
If you are at the start of your crafting-turned-side hustle journey and are also considering in-person markets, I hope you'll find these tips useful in planning for your first attempt, and that it will also provide you with some realistic expectations for success.
As mentioned above, market participation fees can vary wildly! So your first step is to do some research into what the rates are in your area. Urban cities tend to have higher fees, but may also yield more traffic and greater revenue. Smaller towns may have low fees, but very little traffic. Events with higher fees may also be curated (meaning that the organizer picks a limited number of vendors).
Another important question to ask is, what is included in your fee? Do you need to supply your own table and tent (where applicable)? If tables are supplied, what are the dimensions? What is the size of your space? Are commissions charged on top of (or instead of) fees for each of your items sold? Sometimes each vendor is expected to donate a portion of their sales to a specific charity (if the event is also a fundraiser). These are important questions, because these amounts will impact your bottom line, and could even push your net sales into the negative if your costs exceed revenue.
It is a pretty rare thing to be able to just pack your crafts into your car and show up at a market, ready to sell, with no additional supplies or infrastructure. This may work for smaller products at a local flea market that supplies tables for its vendors, but you may still discover that you will benefit from including some of these items.
Gone are the days of a simple cash economy! These days, customers want and expect payment options. And the move towards a 'cashless' world has meant that vendors are often expected to offer cash, credit, and/or other cashless payment options.
Cash
Which payment options you are expected to offer will depend on the local culture, the average price of your items, and the availability of wi-fi or internet at your market location. It is definitely more common at farmer's markets and when selling smaller items to offer cash payments only. If that is the only option (or one of the options) you choose, you will need a cash float.
A cash float is an amount of money, usually in smaller denominations, that the seller uses to make change. The difference in the amount of money in your float at the end of the sales period, minus the start of the sales period, should match your gross sales revenue.
You also need to decide how you are going to store your float and any cash you receive? This could be as simple as a purse (although depending on the size and style of your purse, you may not find this practical), or you may choose to use a cash box or money belt. Is there a secure area to store a lock box? Or do you feel more comfortable keeping cash on your person?
Keep in mind also, that even if you prefer to go cashless for payments, you may appreciate having cash as a back-up option, because internet access is not always reliable!
Electronic Transfer
Even before the pandemic, there was a growing trend towards being 'cash free', but certainly the need for social distancing has pushed even more people towards cashless options. Again, whether this is a viable option for you will depend on whether this option is commonly available in your country or jurisdiction, and whether you and your customers have access to wi-fi or the capability to use mobile banking on the spot.
E-transfers can be a quick and easy way to accept payments; although you may want to get a dedicated email account for customers to send payments to, if you don't want to be handing out your personal email to strangers. Other than an email, all you'll need to receive payments is your mobile phone or tablet with wi-fi or data plan. Keep in mind that if you are using data, you could very quickly exceed the data limits of your plan, so be sure to check ahead of time if you need to increase your plan or get a temporary top-up.
PayPal
Using PayPal for cashless payments is a very similar process to e-transfers. Again, whether this is a viable option for you will depend on access to the internet, and how common a payment method this is in your area.
Don't have a PayPal account? Get one now.
Credit Card and Interac Payments
There are many options for receiving credit card or Interac payments as a small vendor these days, and which one will work for you or is suitable for your business will depend on your needs, as well as your current equipment and website provider, and how much connectivity and seamlessness you want between them. The first thing you'll need to accept card payments is a card reader.
A card reader connects with an app on your mobile device, either directly (eg. via audio jack or lightning connector), or through Bluetooth, to allow you to take credit card or Interac payments.
Because my website is powered by Shopify, I wanted to use a card reader that would interface directly with my online store. I chose to purchase one of their card readers which works with their Point-of-Sale app.
Shopify has two options of card readers: The newer Tap & Chip Card Reader (get it here in the U.S. and here in Canada), which works using your phone or tablet's Bluetooth, or their older and much cheaper Swipe Card Reader (only available in Canada), which plugs into your device's audio jack.
I opted for the Swipe, because at $9 CAD (compared to $69 CAD for the Tap & Chip Reader), even with having to buy a $10 adaptor for my iPhone (which has no audio jack), it was still the most cost-effective option for me.
If you sell through Etsy, you may find the Square card reader the most practical, because they have a direct interface (you can find out more about Square by clicking on 'Integrations' in your Etsy Shop Manager).
Square offers a free audio jack card reader (get it here).
There are many more card reader options out there, which you can use with or without software or apps (some, like the Square, will let you upload stock info manually), and there are many third party apps that will help interface card readers with your existing website, but be prepared to pay extra for that service!
Recording Payments and Invoices
If you are using a card reader and/or mobile apps to record your sales, you will generally provide invoices to customers via email. But if you are operating solely with cash, you may want to have a pad of paper invoices handy. Some customers may also just prefer a paper receipt. I bought a small sales order book like this one for this purpose, which you can get at any office supply store or Amazon.
Phone or Tablet Charger
Making a plan to take cashless payments, only to find that your mobile device runs out of juice before the end of your sales day can be both devastating and embarrassing. Even if plugs, outlets and extension cords are supposed to be available at your location, you don't want to plan on that, and show up to find they're all taken! Bringing one or two chargers with you as emergency backup is a good idea.
You will need a table or other surface to display your products, and if the market is outdoors, a canopy. If you're lucky, a table and/or a canopy will be included in your registration fee, but this is rare. I would also recommend asking the organizer if those items may be available for rent, since that may be much cheaper than purchasing them yourself, especially if you expect to get limited usage out of them.
The cheapest option, if you don't already own these, is to borrow them from someone else, which is what I did. My friend's canopy, a 10 x 10 pop-up from Ozark Trail was easy to set up (although I definitely recommend using more than one person). You can find the model I used on walmart.ca here. Pop-up canopies, rather than the kind you have to build or put together, are probably the only practical option for fast set up and take-down.
If your market location is on grass, you can affix your canopy using the tent pegs that come with your canopy. However, if you are in a very windy area or the market is in a parking lot or on asphalt or concrete, you'll need tent weights. The market I was at had a mandatory requirement for weights, and although it's an added expense, I did find that it took very little wind to start moving the canopy, so I think it's a good idea.
These don't have to be pretty - exercise weights, bags of sand, bricks, concrete blocks - really anything that is heavy and can be attached to your canopy poles will work. In my case, I didn't have access to any of these options, but found these water weights from Amazon.ca a great option. I like them because they fold down small for storage, and because water was something I had ready access to for filling.
You can also find various options on Amazon.com to suit your needs.
Creating a dynamic display for your products, even if you're on a limited budget, will attract more customers and make you look more professional. You probably have items at home (or that you can borrow), that you can use at no added expense, including:
Even Tupperware or Rubbermaid containers, although not the prettiest, can work well for displaying and organizing tiny items. If you do buy display items, it's definitely worth shopping around to get the best prices. Dollar stores are a good option, as well as Amazon or office supply stores.
Depending on the size and nature of your items, you could forego packaging, but it feels a bit... impolite. At a minimum, reusing grocery bags at least provides your customer with an option to carry their items home, and they may appreciate your thriftiness.
There are plenty of options for packaging, including wrapping paper, plastic or paper bags, and boxes. These items are readily available on Amazon, but if you need to purchase them in large quantities, or are combining your purchase with other storefront-type items (like display cases or signs), consider checking prices with a company that specializes in these things.
In Canada, I purchased my bags and some display items through Eddie's Hang-Up Display. Another good option for Canadian sellers is Uline.
In the end, my personal market experience was just.. so-so. I did not make any sales, although I received lots of great feedback and many people took my card and indicated they'd be visiting my online store later. I think there were a few factors influencing this 'failure', and you may want to consider them when deciding if a particular market is the right fit for your store:
What has your experience been with in-person craft markets? What worked in your favour, and what would you do differently?
EDIT: As of September 13, 2021 Bernat Alize Blanket-EZ Graph It yarn is showing in stock on the Yarnspirations website!
As of August 17, 2021 Bernat Alize Blanket-EZ Graph It yarn is showing in stock on the Joann website, although customers are reporting orders are being cancelled due to lack of availability.
Thanks very much to @crypt.cutie on Instagram for giving me the heads up about this new yarn! Be sure to check out her gorgeous colour-blocked loop yarn sweaters on her instagram page and in her depop store!
Up until now, Alize Puffy More yarn from the Turkish-based company Alize yarns was a unique product: a bi-coloured double-stranded loop yarn, which allowed finger-knitters to make beautiful mosaic-style colour work patterns, which had the benefit of being double-sided, giving blankets a very polished look.
This yarn has been increasingly popular in the Middle East and Eastern Europe, and subsequently North America, with knitters paying to import the yarn from sellers on Etsy and Amazon.
So really, it's no surprise that Bernat has released a North American version of this beautiful yarn, called Bernat Alize Blanket-EZ Graph It yarn.
At this point, the only place I've found this yarn listed online is on Joann's website here, where it is listed as out-of-stock, and it seems like it will only available in a limited number of colours.
At the time of this blog post, this product does not seem to be listed on the Yarnspirations website or Amazon or anywhere else that I could find, but I would expect that once distribution starts, knitters will have multiple options for purchase.
Based on the information in the Joann's listing, it seems that the skein weight of the Graph It yarn will be similar to Bernat Alize Blanket-EZ yarn (180g/6.4oz), so larger skeins than the Alize Puffy More yarn, and with more yards per skein than the Alize Puffy More.
While information on loop size is not currently available, I presume that they will be similar in size to the Alize Puffy More loops (given that Bernat Alize Blanket-EZ yarn and Alize Puffy yarns are virtually interchangeable, except for skein size). EDIT: Turns out loop size is slightly different - the Bernat loops are 25% taller!
I've updated my Loop Yarn Conversion Chart and Loop yarn sizes: How do they compare? blog post to reflect this new information and have added instructions on how to adjust your yarn quantity from one brand to the other.
EDIT (October 3, 2021): Yarnspirations has added this instructional video:
Have you seen this product in store? Have you used it yet? Let us know!
]]>
My blanket patterns come in a pretty narrow range of sizes, and there are reasons for that:
But that doesn't mean that my patterns can't be modified to larger and smaller sizes! And there are many ways to add special touches to make your blanket stand out from others.
Changing materials is the most common modification that customers want to make when using knitting patterns. Whether you can't find the loop yarn suggested in the pattern, or you have a preference for certain brands, knowing how a substitution in yarn will affect the overall dimensions of the pattern is your first step.
To understand the differences between loop yarn brands, I recommend reading my blog post Loop yarn sizes: How do they compare? and using our Loop Yarn Conversion Chart which will guide you on substituting one brand of loop yarn for another.
Can't find your brand in my conversion chart? You'll find the formula for calculating the conversion for any brands of loop yarn in our Loop Yarn Worksheets download.
Or, if you'd rather stick with the original recommended yarn brand, but are having difficulty sourcing it, check out my shopping resource: Where to Buy Loop Yarn, which has links for where to find different brands by country.
Modifying the size of your pattern can be intimidating at first, and the approach you take when increasing or decreasing the size will depend on the type of design.
The easiest way to make your pattern larger is to add rows and columns to all sides of the pattern. This will turn your original pattern into a centre motif and give the edges of your blanket a more finished look.
You can achieve this by adding more stitches to all sides of your blanket as you knit, or if you prefer, by adding multiple rows of borders around the edge of your blanket once you're done (this second option is also an easy way to switch to a different colour, as you'll see below).
The easiest way to plan out your modifications is by using graph paper (like our Printable Graph Paper), but even sketching your plan on a piece of scrap paper can work, and help you plan your thoughts.
Many of my patterns have repeating rows or motifs. To stretch this style of blanket, you just need to increase the number of repeats horizontally and vertically. Not sure about where the repeat begins or ends when looking at the pattern? Feel free to send me a message and I'll walk you through it!
To increase the length of Irish Aran/Celtic designs, you can increase the centre motif using the instructions for repeats as outlined above. To increase the width of these blankets, you have a few options.
One option is to increase the 'blank' space around your centre motifs. Another is to add more cables and ribbing to the side panels - there are so many different cable options available, and it's a great opportunity to customize your design. To see cable options and/or get inspiration - see my blog post on cables here.
For example, one of my customers requested a larger and wider version of my Chunky Celtic Cable Saxon Braid Blanket (original pattern on the left, custom version on the right).
To add width to the original pattern, I kept the centre motif (repeating it upward), but added more ribbing, and a flat cable on each of the side panels. I also changed the columns of ribbing flanking the centre motif to double rope cables, giving them a 'fish-tail' cable look, because I felt the centre of the blanket needed a bit more impact.
Sometimes you just need to play around a bit with combining ribbing and different kinds of cables until you get a mix that 'feels' right, based on your personal preferences.
If you need help figuring how many rows and columns you need to add to the design to get the size you want, and how many more skeins you'll need, our Loop Yarn Worksheets can help walk you through the needed estimates and calculations.
The methods for reducing the size of your blanket are very similar to increasing it - instead of increasing the number repeats, you will decrease them. If you don't have enough room for all the original motifs, pick and choose some to highlight in smaller numbers. Decrease width by removing columns of cables or ribbing.
Once again using my Chunky Celtic Cable Saxon Braid Blanket as an example, when my sister requested a baby blanket using this pattern, I removed columns of ribbing on the sides, and used fewer repeats of the centre motif. You can find that smaller pattern here.
When it comes to using more than one colour in your blanket designs, there are many options. Intarsia knitting can be a bit more complicated with loop yarn, but it's not impossible!
The simplest way to add a second colour to your blanket is to knit in bands of horizontal stripes. This is a technique that most loop yarn knitters can handle easily, because it's just a matter of tying your ends together and starting a new skein.
The second easiest way would be to add a border around the outside of your blanket (as mentioned above in Changing Size).
A bit more complicated is the method of adding vertical stripes of colour to your design. This technique tends to work best on patterns that already have ribbing or vertical lines in the design, because it gives you a natural spot to bind the edges of two different colours/skeins where it will appear more seamless and tidy.
Last year, one of my customers requested a custom version of my Wall of Climbing Vines Blanket in a similar size to my original, but using three different colours of their choice. I recommended alternating two of the colours vertically and using the third colour for the border. See below the original pattern on the left, and the finished custom blanket on the right:
Here is how I achieved this look, using 1 skein of mint, 3 skeins of pink, and 2 skeins of dark grey yarn:
Here is a partial look at how I modified my original pattern template to keep track of my different skeins:
There are many ways to personalize your blankets. Personalizing your blankets with special touches is a great way to make your blanket different from others who knit from the same patterns, and really make it your own.
Most of my blanket patterns have fairly simple edges or borders, because choose to focus on creating designs quickly, and frogging and reusing the same yarn multiple times. But there are many ideas and examples out there for giving the edge of your blankets a bit of flair.
For my custom colour stripe Wall of Climbing Vines Blanket above, I used a simple double-bound edge. For my Circular Crochet-Look Throw Blanket Pattern, I created a braided scalloped edge that could be added to any pattern, including square or rectangular blankets:
Another option is to add embellishments to your blanket. This can be something as simple as weaving stripes of different colours, like in the Bernat Alize EZ Mad for Plaid Blanket pattern from Yarnspirations, or adding decorative features like stars, shapes or lettering.
LoopsofloveByTara, another Etsy seller, has made lettering one of her signature custom looks! Check out this great sports blanket on her instagram page below. You can find more of her loop blankets in her Etsy store.
Whether you are knitting blankets for sale, or gifting them to friends and family, nothing says "I made this" more than adding personalized tags. Pre-printed leather labels are probably the most popular way to tag your knitted items right now, and they're especially good for loop yarn blankets, because they feel heavy and substantial and match the chunkiness of the chenille loops.
.
You can find lots of options on Amazon (see my links above), but Etsy is also a great option, especially if you want more flexibility for personalizing the information on your tags.
Do you have any favourite products or special touches that you like to add to your knitted blankets? Is there a question about customization I haven't answered that you want more information about?
]]>
As part of a continuing series, I'll be highlighting different special stitches and motifs. Click here to read my previous spotlight on the Horizontal Chain Stitch.
One of the most popular styles of stitches in Irish and Celtic knitting is the cable stitch. There are actually many different types of cable stitches, but what they all have in common is their resemblance to ropes or cables. In Irish Aran knitting, cables are meant to be symbolic of a Fisherman's rope. In Celtic knitting, cables are often incorporated into knots and woven designs, which also have their own symbolic meanings.
Creating cables in loop yarn finger knitting follows a very similar concept and technique to standard knitting. They can also be fairly simple and two-dimensional, or raised and chunky. I've put together a list of examples here, but it is by no means exhaustive. I encourage you to play around with stitch combinations and come up with your own!
The easiest cable stitches are flat. They create the impression of a twisting cable, without the height or puffiness. This video by The Crochet Crowd walks you creating this motif, from a combination of knit and criss-cross stitches (If you need a tutorial on criss-cross stitches - read this blog post).
You can modify the look of flat cables by increasing the width, or adding more rows of knit stitches in between the twists.
Examples of patterns with flat cables: Extra-Chunky Braid Cable Blanket, Extra-Chunky Staghorn Cable Blanket, Extra-Big Braided Celtic Cable Saxon Braid Blanket, Woven Lattice Cable Blanket, Celtic Interlaced Knot Blanket
Rope cables are super easy and only require repeating one stitch over and over again: the criss-cross stitch. In the image below you can see flat cables on the far right, and two rope cables on the left. The left rope cable is made by stacking cross-over left stitches, and the right is made by stacking cross-over right stitches. You can see that combining rope cables creates its own cable motif - a fishtail plait or fishtail cable.
Patterns with rope cables: Chunky Celtic Cable Saxon Braid Blanket, Super Chunky Staghorn Cable Blanket, Celtic Cable Saxon Braid Baby Blanket, Celtic Cable Saxon Braid Shawl Wrap, Celtic Interlaced Knot Blanket, Extra-Chunky Braid Cable Blanket, Checkerboard Cable Blanket, Celtic Cable Knotted Braid Blanket, Repeating Rope Cable Knit Blanket, Irish Aran Diamond and Honeycomb Blanket
Chain cables look exactly like the name - links of a chain. They are made by repeating a honeycomb motif. Like the flat cables above, this is made by combining knit and criss-cross stitches. If you look at the example below, you can see the honeycomb is made as follows (by repeating four rows of four stitches):
From the bottom up:
In between each honeycomb, you will knit 4 stitches to join the links of your chain. And then repeat these four rows to make more chains.
Patterns with chain cables: Checkerboard Cable Blanket, Irish Aran Cabled Trellis Blanket
Making chunky cables is a bit trickier. You will use the same technique as criss-cross stitches, but instead of crossing one loop over another, you will cross multiple loops (e.g. two over two, or three over three, etc.).
This video (at around the 16:45 mark) by garnet isajewel walks you through the process of creating a 4-loop cable (2 loops over 2 loops).
Once you get the hang of chunky cables, you can also use this technique to make chunky versions of other cable styles, like braid cables and staghorn cables.
Patterns with chunky cables: Chunky Celtic Cable Saxon Braid Blanket, Celtic Cable Saxon Braid Shawl Wrap, Celtic Shamrock Clover Blanket, Celtic Cable Saxon Braid Baby Blanket, Slip and Slide Cable Blanket, Extra-Chunky Braid Cable Blanket, Extra-Chunky Staghorn Cable Blanket, Celtic Cable Knotted Braid Blanket
One of the most popular cables in Irish Aran knitting is the Staghorn Cable. The image below shows a combination of two types of cables. On the right is a flat cable (same technique as the video above, except that I have widened it and made a flat rope cable). On the left is a staghorn cable. To make the staghorn, you will repeat two rows of six stitches.
From the bottom up:
And that's it! Repeating those two rows yields a cable that sort of grows out of its centre and looks like a stag's horns.
Patterns with staghorn cables: Super Chunky Staghorn Cable Blanket, Irish Aran Tree of Life Cable Knit Blanket, Extra-Chunky Staghorn Cable Blanket
Braid cables are created by weaving three or more strands together. Below you'll see three cables. On the far right is a flat cable (by adding rows of knit stitches in between the cross-over stitch, I've changed the look from a simple flat cable). In the middle, there are actually two braid cables, side by side (see how combining multiple cables changes the look of the motif?). To create a single braid cable, you will repeat two rows of three stitches.
From the bottom up:
Patterns with braid cables: Celtic Shamrock Clover Blanket, Extra-Big Braided Celtic Cable Saxon Braid Blanket
Celtic knots and braids are often the centrepiece of Celtic knitting. They follow the same rules as braid cables, in that the individual cable strands are woven together such that each strand travels over and under each strand it crosses. It is very important to follow this rule, because without weaving your strands correctly, you'll be left with a knot that looks unbalanced. Celtic knots and braids can have a few rows of repeats, or dozens. You are really only limited by your creativity! Below are some examples of classic Celtic braid and knot designs.
The Saxon braid is a classic 6-strand Celtic knot:
The Celtic love knot is a pretty and balanced design that simultaneously looks like four hearts and a four-leaf clover.
Patterns with cable knots: Chunky Celtic Cable Saxon Braid Blanket, Twisted Chain Celtic Cable Blanket, Celtic Cable Saxon Braid Shawl Wrap, Celtic Shamrock Clover Blanket, Celtic Cable Saxon Braid Baby Blanket, Celtic Interlaced Knot Blanket, Celtic Cable Knotted Braid Blanket, Irish Aran Cabled Trellis Blanket, Extra-Big Braided Celtic Cable Saxon Braid Blanket, Irish Aran Diamond and Honeycomb Blanket
]]>
One of the reasons I got into writing patterns was because I wanted to create designs with loop yarn that weren't found anywhere else, and coming up with new ways to use it (or interpreting existing knitting techniques for loop yarn) is part of what keeps finger knitting exciting for me.
While I don't currently have any intention of making full-length video tutorials (the reasons why are a bit too long to detail here, but in short, I don't have the skill or technology to do so, and it would also be so time-consuming that I would be able to also knit and write patterns), I thought the occasional blog post to explain special stitches might help. I've received multiple requests for these, so I hope you find them useful!
You can find this stitch in several of my patterns, and it is the basis for my Brioche Knit Style designs:
Horizontal chain stitches are not new, per se - if you google this phrase, you'll find it as a standard knitting stitch technique. But at the time I began writing patterns, no one was using it in loop yarn knitting (and at the time of this post, I'm the only one using it in finger-knitting patterns).
When I began writing loop yarn knitting patterns, there were only a certain number of stitches out there in regular practice: knit, purl, criss-cross, cables, increasing and decreasing stitches, binding or casting off, and eyelet stitches (see the Yarnspirations Multi-Texture Blanket).
I had designs that I wanted to create which required horizontal lines, with no way to knit them. So I created my own technique!
There are a few things to remember when using this stitch:
It's purely decorative.
The horizontal chain stitch doesn't add any length or width to your blanket. It's more of an adornment.
This stitch adds superficial texture to your blanket, but it isn't a true 'row' (although for the sake of clarity, it's treated that way in your pattern instructions). For this reason, using many horizontal chain stitch rows in a pattern can alter the overall 'squareness' of your blanket and make it irregular-shaped (although I think that adds to the hand-crafted feel of the design).
It's a very yarn-heavy technique.
Because it sits on top of your blanket design, but doesn't actually add length to your project, you'll use double the yarn for each row of horizontal chain stitch you include. While this obviously adds cost, it also adds weight. Patterns like my brioche-knit style blankets are extra-squishy and heavy - and that also makes them suitable for things like rugs or pet mats.
To begin the first stitch of a horizontal chain, you will point your first working loop in the direction of the chain. I recommend turning your blanket so that you are working your chain upward, but you may not find this necessary once you grow accustomed to the technique.
Now take your working loop and place it over the first stationary loop. They should be perpendicular to each other in a + shape. You will then take the next working loop after that, and pull it up through both of the two stacked loops.
The bottom loop you pulled through to make your first horizontal chain stitch becomes the top loop for your second chain stitch, and you will repeat the process for as many links in your chain (stitches) that the pattern calls for.
Each horizontal chain stitch consists of a sandwich of three loops:
I've made a rudimentary video clip to show these stitches in process (apologies for the quality - this was shot with my phone, using a cheap stand and no second set of hands!).
At the end of your chain links, you will be left with a loop sticking out (this is the last working loop you pulled up through your previous stitch). This loop needs to be incorporated by your next stitch.
For example, if your next stitch is a knit stitch, you will place your horizontal loop underneath your stationary loop, and pull your next working stitch up through both loops. This 'hides' the horizontal loop so that the next stitch just looks like a regular knit stitch. You are sandwiching the last chain link in the centre of your knit stitch.
After you create a string of horizontal chain stitches, you will be left with a following row that is 'missing' loops. To knit this row you will need to access the top of the stationary loops of your previous row (which are sandwiched in the middle of your chains) and pull working loops through the tops of those loops.
If you feel along the horizontal chain, you will feel the 'nubs' of the top of the stationary loops that are sandwiched in between the chains.
To create the knit or purl stitches for this row, you will pull working loops through these stationary loops. Here is a short video clip demonstrating knit stitches on these loops.
I hope this makes things a little clearer! I look forward to seeing your horizontal chain stitch designs - tag me on instagram at @iloveblanket.
]]>
Although Middle-Eastern and Eastern European loop yarn knitters are very familiar with the Alize Puffy brand, most of us in North America have to seek out distributors on Amazon and Etsy. I decided it was time to try out these yarns myself, since many of my customers do substitute Alize Puffy yarns when using my patterns.
I ordered two products last month, some skeins Alize Puffy yarn (similar to our Bernat Alize Blanket-EZ yarn, and some skeins Alize Puffy More yarn.
The first thing I noticed that was different about this yarn, other than the conjoined loops, was the size. Alize Puffy More loops are about 20 mm tall, which is about half the height of the other North American loop yarns on the market.
This reduced size makes for a finer look to your designs, but also impacts the ability to finger-knit it. I found it much easier to use a crochet hook when knitting it - finger-knitting was a bit awkward and fussy. Also, if one of the things you love about loop yarn is how fast you can complete your projects, you'll find this is a much slower knit.
Because of the smaller loops, you will also need more loops to complete a blanket. Whereas a 40" by 40" blanket with Bernat Alize Blanket-EZ yarn might be around 55 stitches by 50 stitches, to knit a blanket of the same dimensions with Alize Puffy More yarn, you'll need around 80 stitches by 80 stitches.
Between the loop size and the fact that you have to knit two sides to every design, you can expect patterns with this yarn to take you around 4 or 5 times longer.
In terms of texture, I found it more similar to Red Heart Loop-It and Lion Brand Off The Hook yarns, with a tighter nap. It's still a soft chenille, but less 'fluffy'.
Is it worth it? I would say yes. While I'm not ready to give up my regular loop yarn, this is definitely an attractive product. Designs knitted with Alize Puffy More have a tight knit and heavy feel.
The edges have a double-bind look that is very clean and professional-looking. It's perfect for graphic two-tone colourwork designs (something that standard loop yarn can achieve, but then you're left with a less polished look on the back of your blanket). It's the perfect product for knitting rugs.
If you'd like a video tutorial on this new yarn, here is an excellent one from Alize Yarns:
I've also created a set of general instructions for knitting Alize Puffy More yarn projects here, which you may refer to when downloading patterns I've written using this yarn.
If you'd like to try this yarn, I suggest a google search to find the best option for sourcing it near you. In Canada, I found the best option was to purchase it through a Turkish seller. I used Happillow on Etsy and had a good experience. They offer free shipping with a minimum purchase. I paid a small additional fee for express shipping, and received my order nine days later, with no additional brokerage or customs fees. (This is my personal experience and customs/brokerage fees can be a bit unpredictable, so do not take this as a guarantee).
There are many Etsy vendors selling this yarn (click here to search Etsy), so I would recommend choosing one with many positive reviews from buyers in your country. Another option is Amazon. Because this is still a relatively new product, as time goes on, there will likely be more options for purchasing it as it becomes more widely available. And hopefully a North American producer will create their own version.
Ready to try it out? Try my free BUFFALO PLAID BLANKET pattern!
I'm also writing new Alize Puffy More patterns every month - you can peruse my collection here.
Want to design your own Alize Puffy More patterns? Check out this pattern generator on the Alize Puffy More website. The video below explains how the website works:
Have you used this product? Let me know what you think about it in the comments!
]]>
I am frequently asked if customers can use a different brand of loop yarn with my patterns. The answer is usually 'yes', but because different brands can have different size loops and skeins, the results can be a bit unpredictable!
I thought it might be helpful to write a blog post de-mystifying the differences between brands.
There are three variables that you need to consider when converting a loop yarn pattern from one brand to another: The length of your balls, the loop height (this will affect the length of your blanket) and the space between loops (this will impact the width of your blanket).
I've made a chart detailing the dimensions for each yarn brand below. They generally fall into four size categories:
Of note, I have found that Red Heart Loop-It yarns appear to have inconsistent loop sizes - see in the photo below: The loop size of Berry Gorgeous (on the left) is a full 3mm shorter than the loop size of Purr-ple (on the right). Because of this, I definitely recommend measuring your loop size when using this brand to confirm before estimating your results.
Also, many people confuse Alize Puffy and Alize Puffy Fine yarns - there is a big size difference between the two - Alize Puffy is the one that is most similar to Bernat Alize Blanket-EZ; whereas Alize Puffy Fine is much tinier, and most often used for baby blankets, baby clothing and knitted toys.
YARN BRAND | Material | Skein weight | Skein length | Loop height | Space between loops |
Bernat Alize EZ-Wool | Wool blend | 150g / 5.3oz | 10m / 11y | 50mm / 2" | 10mm / 0.4" |
Bernat Alize Blanket-EZ | Polyester Chenille | 180g / 6.4oz | 16m / 18y | 40mm / 1.6" | 20mm / 0.8" |
Alize Puffy | Polyester Chenille | 100g / 3.5oz | 9.2m / 10y | 40mm / 1.6" | 20mm / 0.8" |
Lion Brand Crayola Off The Hook | Polyester Chenille | 100g / 3.5oz | 7m / 8y | 40mm / 1.6" | 15mm / 0.6" |
Lion Brand Off The Hook | Polyester Chenille | 100g / 3.5oz | 7m / 8y | 40mm / 1.6" | 15mm / 0.6" |
Red Heart Loop It | Polyester Chenille | 100g / 3.5oz | 7m / 8y | 38-41mm / 1.5-1.6" | 15mm / 0.6" |
Bernat Alize Blanket-EZ Graph It **NEW** | Polyester Chenille | 180g / 6.4oz | 14m / 15.3y | 25mm / 1" | 15mm / 0.6" |
Alize Puffy Fine | Polyester Chenille | 100g / 3.5oz | 14m / 15.3y | 20mm / 0.8" | 15mm / 0.6" |
Alize Puffy More | Polyester Chenille | 150g / 5.3oz | 11.5m / 12.6y | 20mm / 0.8" | 15mm / 0.6" |
I've included a conversion chart below for the yarns you will find in my patterns.
To use the chart: Find the yarn brand suggested in the pattern in the 'From' column, then scroll down to the yarn you want to substitute in the 'To' column. The 'Result' column tells you how the pattern dimensions will be affected, and how much more/less skeins of yarn you will need to complete the project as-is.
You can also find a link to our Loop Yarn Conversion Chart at the bottom of this page, along with other useful reference tables. If you'd prefer to print off your own copies of our charts, check out our Loop Yarn Worksheets download.
These results are only estimates and because of variations in manufacturing, your results may vary.
From | To | Result |
Bernat Alize Blanket-EZ | Alize Puffy |
|
Lion Brand Off The Hook yarns |
|
|
Red Heart Loop It |
|
|
Alize Puffy Fine |
|
|
Lion Brand Off The Hook yarns | Bernat Alize Blanket-EZ |
|
Alize Puffy |
|
|
Red Heart Loop It |
|
|
Alize Puffy Fine |
|
|
Red Heart Loop It | Bernat Alize Blanket-EZ |
|
Alize Puffy |
|
|
Lion Brand Off The Hook yarns |
|
|
Alize Puffy Fine |
|
|
Alize Puffy | Bernat Alize Blanket-EZ |
|
Lion Brand Off The Hook |
|
|
Red Heart Loop It |
|
|
Alize Puffy Fine |
|
|
Alize Puffy Fine | Bernat Alize Blanket-EZ |
|
Lion Brand Off The Hook |
|
|
Red Heart Loop It |
|
|
Alize Puffy |
|
|
Alize Puffy More | Bernat Alize Blanket-EZ Graph It **NEW** |
|
Bernat Alize Blanket-EZ Graph It **NEW** | Alize Puffy More |
|
Do you use a different brand of loop yarn? Want to help me make a more extensive resource list?
If you use a brand of loop yarn not shown here, please send me the details in the comment section below or using my contact form!
]]>
This business started innocently enough:
In November of 2019, I was considering handmade options for Christmas gifts for family. I wanted to do something creative, in part to satisfy my own artistic urges, but also because, quite honestly, now that most of my close family are adults, many of us have been steering away from the usual consumerism of Christmas.
Not that there's anything wrong with that per se (you do you!), but:
I wanted to do something more personal.
I perused Pinterest and YouTube, initially being drawn in by hand knitting, and then getting drawn into loop yarn. I had vague memories of seeing loop yarn skeins in the store before (without knowing what they were), but this was my first time really looking into it.
After I finished my Christmas gifts (two scarves and two baby blankets), I was hooked and wanted to do more. I quickly knit up my leftover yarn into hats and ordered more. But I was faced with a dilemma - yarn was expensive, and I live in a 650 square foot apartment, with very little storage space - how was I going to sustain this hobby? Oops.
(Spacesaver Vacuum Bags are my saviour, by the way! Great for storing both my knitting projects and yarn, and I use the small ones to mail my blankets to you!)
After a short stint of trying to sell my hats and blankets to friends and family on Facebook, I fairly quickly ended up on Etsy, in the hopes I might sell the knitted items that were quickly accumulating. And then...
After some frustrating delivery and yarn availability issues, I decided that maybe pattern-writing might be more lucrative and satisfying. I had already knitted two original blankets at that point, so why not write them up and try to sell them? The only thing stopping me was... um... zero experience in pattern writing? Lol.
I had knit a few blankets using free Yarnspirations patterns (my Luxurious Chevron Stripe Ripple Blanket, modified from their Bernat Alize Ripple Blanket pattern is still available for sale!), and I had done some technical writing, so I just jumped into it and hoped that people might buy them.
I was very unsure in those early days if people would take a chance on an unknown pattern-writer, but with so little out there in terms of patterns for loop yarn, I was banking on the fact that other knitters who loved it as much as I did, would be anxious for new challenges.
And now here we are, at the end of 2020, and I've written a whopping 61 patterns in my first year!
And the business has grown! What started out as an Etsy shop selling knitted goods (I started with about a dozen listings, mostly hats!), expanded fairly quickly and I now also have pattern shops on Ravelry and Lovecrafts, a virtual knitting shop on Ottawa Artisans, and now my own website! I've also started building a community through Instagram and Pinterest - and have even more chances for outreach through this website and my newsletter.
That's one of the most surprising things about this new hobby/business: I've been surprised at how much joy I get out of repeat customers sharing their work with me. I'm somewhat of a reformed misanthrope - answering questions and interacting with customers has been a really fun part of this new job. I love your feedback and when people tell me they've been inspired to start their own businesses or design their own work, that's really exciting for me!
And so, as we come to the end of 2020 (and my knitting business turns 1), I'd like to raise a glass of egg nog and say cheers to you, my customers and loop knitting family. I hope 2021 has great things ahead for all of us (and the end of the pandemic!)
Love and loops,
Reena
]]>
One of the best features of finger knitting is the fact that it requires no special tools or machinery to complete your creative masterpiece.
Unlike standard knitting, you don't need knitting needles, so once you buy your yarn, you are pretty much ready to get started! No needles, no worrying about gauges, and no frustration about making your stitches consistent (every time I've tried standard knitting, my stitches would get tighter and tighter until it was almost impossible to get them off the needles!).
Having said that, different knitters have different habits, needs and preferences, and there are some optional tools you might find helpful.
When it comes to cutting your loop yarn, household scissors will do, really. But sometimes we all want things that are task-specific and a little bit special.
These detail scissors from Singer have great reviews and and are a small and efficient addition to your loop yarn kit:
If you prefer something a bit more decorative and sentimental, you might like the traditional look of these gold crane scissors:
You don't have to use stitch markers when you finger knit, but they can be very useful when knitting chunky cables, or marking your starting spot for each row when knitting in the round (on hat or rug patterns).
If you don't want to spend money on markers, you can use safety pins, or even hair or plant clips. One of the benefits of stitch markers, though, is that they come in different colours - which is useful for keeping track of multiple stitches.
Stitch markers tend to come in huge quantities! You are really only likely to need a small number per loop yarn project - but if you do other knitting or crochet work, larger quantities may appeal to you!
This set of 12 jumbo markers is a good amount to get you started:
NEW: I've added my own handmade Stitch Markers & Charms to my shop! Click here to check them out!
When it comes to tying and weaving in your cut ends of loop yarn when you've finished your project, you can definitely just use your fingers, but depending on your dexterity, you may find it both tricky and tiresome to do so (especially for projects like my Oval Rag Rug, where the yarn is tightly bound together).
Some finger knitters just prefer using a hook to knit instead of their fingers for their entire projects!
I use a US-K 6.5 mm size aluminum crochet hook to weave in my ends - this choice was somewhat arbitrary - when I was buying some yarn, the retailer was offering free crochet hooks as an add-on to your purchase, so I just chose the largest size they were offering.
I find it works well enough to suit my needs, but a bit larger size would work well too. You want a hook large enough that your yarn will catch under the hooked end, but not so large that you can't fit it under tightly woven stitches.
This Susan Bates Aluminum hook is very similar to the one I use:
Don't like aluminum? This Susan Bates Luxite Plastic Crochet Hook has a great reputation and a low price:
Loop yarn is such a large size, that transporting knitting projects to work on them away from home can be a bit more challenging. On the other hand, chenille polyester is super compact-able, so it's definitely possible to squish it into a smaller size and fluff it back up again later.
This yarn bag organizer from Homest is stylish, but also large enough to carry more than a few skeins of loop yarn.
Do you have any favourite knitting accessories or tools that you use when loop yarn knitting?
UPDATE (10/8/2022): Check out our new blog post: New tools and charts for loop yarn knitters.
Whether you are a new or existing customer of I Love My Blanket, you're probably asking yourself,
"Why should I use your store instead of just buying your patterns on Etsy or Ravelry? Why should I buy your blankets here?"
and you might even be asking,
"Now that you have a store, is it okay if I still buy your patterns on Etsy, Ravelry or Lovecrafts?"
Hopefully I can answer those questions!
If you are a loyal Etsy or Ravelry customer - have no fear! My patterns and blankets will still be available there, in my existing shops (although free patterns on Ravelry will now be routed through my store). But you may find you want to visit here, as well!
"Why?"
Because I've created this website to be more than just a store. Yes, you can buy my patterns and knitted items here, but I hope you'll find yourself sticking around for the other elements I've created.
I'm hoping to continue to add new features to this site, including more resource materials, regular blog posts, and a newsletter, for anyone wanting to know when new patterns are added to the site.
Thanks for stopping by!
Reena
]]>
Whether you're an existing customer who previously bought patterns from me on Etsy, Ravelry and Lovecrafts, or you're new to my patterns and knitted goods, I'm very happy to welcome you to the new website.
While I work out the bugs (and adding accessibility things like alt text to hundreds of images), there may be some clunkiness and/or broken links that I've missed, so I appreciate your patience while I tidy things up for the official launch on December 2nd, 2020.
The store is fully functional! So feel free to download free patterns and make purchases while I tidy up all the 'extras'.
Reena
]]>